1、创建Fragment的布局文件,如fragment_up.xml;
1 2 3 4 5 6 7 8 9 10 11 | < ?xml version="1.0" encoding="utf-8"?> <linearlayout xmlns:android="http://schemas.android.com/apk/res/android" android:orientation="vertical" android:layout_width="match_parent" android:layout_height="match_parent" android:background="#FF0000"> <textview android:layout_width="wrap_content" android:layout_height="wrap_content" android:text="Hello Fragment" android:textColor="#FFFFFF"></textview> </linearlayout> |
2、创建Fragment的子类,实现onCreateView()方法;
1 2 3 4 5 6 7 8 9 10 11 12 13 14 15 16 17 18 19 20 21 22 | package com.yusian.fragment; import android.app.Fragment; import android.os.Bundle; import android.support.annotation.Nullable; import android.view.LayoutInflater; import android.view.View; import android.view.ViewGroup; /** * Created by Sian on 2017/3/18. */ public class UpFragment extends Fragment { @Nullable @Override // 相当于Activity的setContentView; public View onCreateView(LayoutInflater inflater, @Nullable ViewGroup container, Bundle savedInstanceState) { return inflater.inflate(R.layout.fragment_up, container, false); } } |
3、在Activity的布局文件中添加fragment标签
1 2 3 4 5 6 7 8 9 10 11 12 13 14 15 16 17 18 | <?xml version="1.0" encoding="utf-8"?> <LinearLayout xmlns:android="http://schemas.android.com/apk/res/android" xmlns:tools="http://schemas.android.com/tools" android:layout_width="match_parent" android:layout_height="match_parent" android:orientation="vertical" android:weightSum="2" tools:context="com.yusian.fragment.MainActivity"> <fragment android:id="@+id/fg_first" android:layout_width="match_parent" android:layout_height="0dp" android:layout_weight="1" android:name="com.yusian.fragment.UpFragment"/> </LinearLayout> |
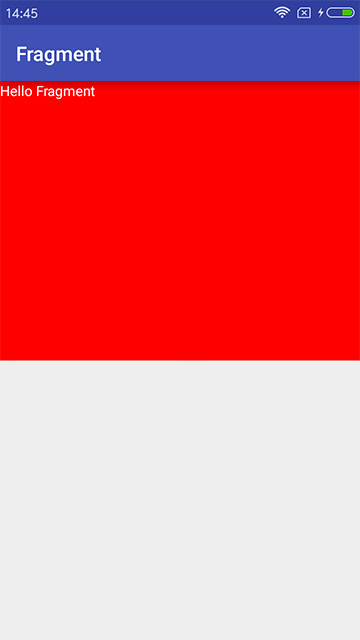
4、最终效果
Pingback: Android基础开发之Fragment的简单使用(动态加载) | 小龙虾博客 (Crayfish)